If you're feeling iffy, here are three reasons to make at least one of these:
- They're easy. (They're not called Do-It-Yourself for nothing!)
- They're cheap. (I'm not a fan of DIY projects that aren't. You might as well hire someone to do it for you if it's just as expensive!)
- You'll feel awesome afterwards. There really is no feeling like making something yourself and being able to show it off to your pals...and maybe everyone else you come into contact with. (Not that I do that, or anything.)
So, there you go. Don't hesitate, just do it!

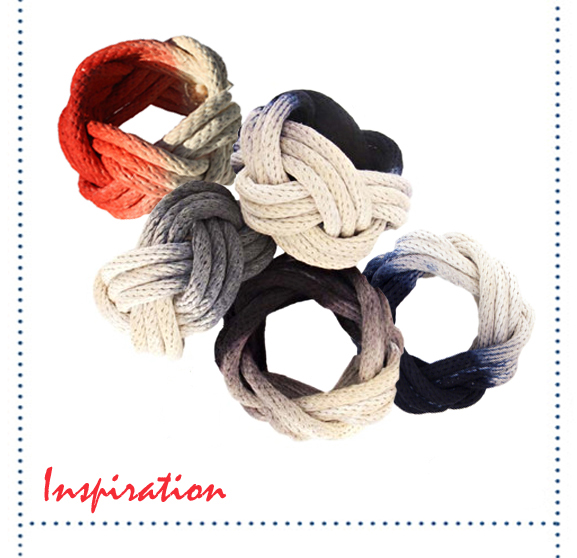
Apparently, this bracelet is based on some fancy-schmancy one from a designer of some sort. To me (and to the lady to DIYed it) it looks ripe for the DIYer like us with its hardware store chicness.
Pros: Super easy. Like, no glue or anything required. And I think it has less than five "ingredients". What's better than that?!
Cons: Pretty much the only one I can spot is that if you're unfortunate enough to have ulnas the size of toothpicks, this one might not be suitable (this means you, Annie!). But I'm thinking some smaller hardware and thinner rope might remedy this problem easily enough.

For a different bracelet look (and a different rope look, now that I see these two projects next to each other) head over here for a super simple (and totally cheap) DIY Nautical Rope Bracelet. (Bonus points for those who choose to dip-dye!)
Pros: So easy. If you know how to braid.
Cons: If you don't know how to braid, you're SOL. Also, the customization to make this thing fit seems to require some trial and error. (How am I going to find a jar that's the circumference of my wrist? Anyone have any baby food jars laying around?)

From D*S is this monster of a light fixture. It's made from a Japanese/Chinese paper lantern (what is the difference between the two?) and has about a hundred scraps of paper attached to it. Neat-o, yes? If you already own a paper lantern, this project could be FREE! Say what?! Yes, right? Click here to hop to the instructions.
Pros: Potentially free. Impossible to screw up.
Cons: Time-consuming. Patience-trying. Keep out of reach of cats, small children and people afraid of bad hair-styles. (Remind anyone else of 80s hair?)

And the one that can go terribly wrong with one slip of the...er, X-Acto. Made from the ever-addicting and brightly colored polymer clay, this lovely necklace is probably the most time consuming and expensive of the lot. Though I'd bet that your bill would still come under 10 bucks for this one. And who can beat an adorable less-than-10-bucks necklace that looks as great as this one?! Brought to you by the lovely ladies at Dismount Creative (an awesome blog to peruse when you have an infinite amount of time to waste--in a good-for-you kind of way). Click here for instructions!
Pros: So pretty! I'd wear mine every day.
Cons: I have no idea how they got their lines so straight, but I have a feeling it's not easy.
Thanks to the ever-inspiring Design Crush for most of these lovely DIYs. You can find the rest of her list on this post.

No comments:
Post a Comment